Let's learn about window.localStorage by building a tiny note-taking app with some simple HTML, CSS, and JavaScript. We'll code up a small UI and autosave the user's notes to their browser. My co-worker keeps all of his snippets on something just like this. I can't believe the mileage he gets out of 50-60 lines of code!
Most client-side storage interactions used to involve manipulating cookies but luckily we now have modern APIs. With cookies, the user sends everything stored with every request meaning worse performance for both parties.
Enter: localStorage. A key/value API that's available on the window object. Unlike sessionStorage which lasts for the during of the page session, localStorage has no expiration time.
All keys and values are converted to Strings. Let's add, update, and delete a key, and then try to read from an empty key. This is console input so the return value follows the command.
// Add key - or overwrite existing keywindow.localStorage.setItem('foo', 'bar')> undefined// Read a value from a keywindow.localStorage.getItem('foo')> "bar"// Delete key - deleting empty yields same return valuewindow.localStorage.removeItem('foo')> undefined// Read from a deleted or unknown keywindow.localStorage.getItem('foo')> null
Other ways you might interact with localStorage involve clearing all keys and iterating through existing keys.
// Get the read-only lengthwindow.localStorage.length> 6// Get the nth keywindow.localStorage.key(0)> "algoliasearch-client-js"// Delete all keyswindow.localStorage.clear()> undefined// Iterate through all keysfor (let i = 0; i < window.localStorage.length; i++) {console.log(window.localStorage.key(i));}
You can try some of these out in your developer console right here. DEV stores the following localStorage keys for me as I'm writing. Make sure not to delete any of these though! algoliasearch-client-js, config_body_class, current_user, https://dev.to/new, pusherTransportTLS.
The App
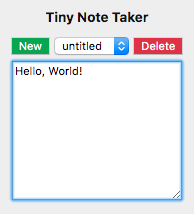
Here's what we'll be making. A small but practical note-taking app. Aside from spacing, it uses little styling (send a pull request). What's important is how the app communicates with the client's browser storage.
Hopefully, you're already thinking of the localStorage methods that we'll need. Let's use a ready-built HTML template that names the functions that we'll be using.
<h5>Tiny Note Taker</h5><div><button onclick="newNote()">New</button><select id="notes" onchange="changeNote()"></select><button onclick="deleteNote()">Delete</button></div><textarea id="editor" rows="10" onkeyup="saveNote()"onkeydown="checkEmpty()" autofocus></textarea><script src="./index.js"></script>
Take a second to think about how these functions might relate to the storage methods we saw just now, and how they will manipulate the DOM.
newNote() Prompt the user for a note name and create it.
changeNote() Swap to the new note when the selected element is changed.
deleteNote() Delete the currently selected note.
saveNote() Save the currently selected note as the user types.
checkEmpty() — This one is less obvious.
If a user arrives at the page and starts typing before creating a new note, the name would be "" an empty String. Instead, as they type but before the note is saved name the current note untitled. We simplify our logic here by separating it into two events. onkeydown checks for an empty note and fixes if necessary. This means that onkeyup can simply save the note without any additional checks. Thus, checkEmpty().
Reminder: Key events are almost always called in this order onkeydown -> onkeypress -> onkeyup and they all have their place!
Let's start with our base case. Saving one note as the user types. Since we've placed the script include at the bottom of the HTML, we can grab a reference to the two elements we need without waiting for any document load events.
const notes = document.querySelector('#notes');const editor = document.querySelector('#editor');
Great. Those references will last for the lifetime of this script as we'll never delete those elements. Next, we need to title the empty-named note as untitled if the user types without first hitting the New button.
/*** Check for empty note title.*/function checkEmpty() {if (notes.length === 0) {const untitled = document.createElement('option');untitled.innerText = 'untitled';notes.appendChild(untitled);}}
Here we create an option element with JavaScript and make it available in the select dropdown. We don't need to do any saving yet, that will happen a few milliseconds later when the user lifts their finger off the current key.
A few milliseconds later.
/*** Save editor text to storage under the current note.*/function saveNote() {window.localStorage.setItem(notes.value, editor.value);}
There's localStorage.setItem! We know what that does. It will save the note text as the value and the note title ("untitled") as the key. Now we have a problem to solve. If the user leaves and comes back, the select dropdown will be empty. Worse: they will overwrite their "untitled" note.
As our script runs, just after we grab references to those elements, let's populate the select dropdown with all the user's saved notes.
const notes = document.querySelector('#notes');const editor = document.querySelector('#editor');// Load user's saved notesfor (let i = 0; i < window.localStorage.length; i++) {const newNote = document.createElement('option');newNote.innerText = window.localStorage.key(i);notes.appendChild(newNote);}changeNote();
Here we use the read-only length property of localStorage as well as its method key(). All saved notes are loaded into the select dropdown. We let the HTML operate as our state. This way we don't need to keep track of any of the notes in our JavaScript. We rely on simple functions to link up the DOM to the Storage API.
At the bottom of that last snippet, we saw changeNote() which loads the currently selected note into the textarea element a.k.a. the editor. This function is also called after a new note is created, which clears the editor. New notes are initialized with an empty String.
/*** Change editor text to the currently selected note.*/function changeNote() {editor.value = window.localStorage.getItem(notes.value);}
The Storage API abstracts away the heavy lifting for us.
User's need a way to name and create notes. newNote() does just that. It uses Element#insertBefore to place the new note at the top of the selectbox. This method is called on the parent element. let insertedNode = parentNode.insertBefore(newNode, referenceNode);. What's neat about this method is that it accepts a null value as the second argument. Meaning we can call insertBefore on empty parent elements!
/*** Ask the user to name their new note then create it.* Add this note to the select div then focus to it.*/function newNote() {const note = prompt('Name of note?');window.localStorage.setItem(note, '');const noteElem = document.createElement('option');noteElem.innerText = note;notes.insertBefore(noteElem, notes.firstChild);// Focus this notenotes.value = note;changeNote();}
Our note taking app is nearly finished. The final function required is for deleting notes. When a user is finished with a note, they can select it and then hit the Delete button. The trickiest part about this function is finding the right note to delete in the select dropdown. One of the drawbacks to using the DOM as our state. We have to loop through every option, checking the value.
/*** Delete currently selected note*/function deleteNote() {const note = notes.value;window.localStorage.removeItem(note);editor.value = '';for (let i = 0; i < notes.length; i++) {const option = notes[i];if (option.value === note) {notes.removeChild(option);}}}
We've now got a fully functioning note taking app, infinitely scalable through a CDN. We used the powerful Storage API and learnt how to use the DOM as application state. Go us! 🙌
Check out the final application code here, and the live version here.